Posts

HP EliteDesk 800 G1 running on 12 volts DC

Running HP EliteDesk 800 G1 USDT on 13.8 volts DC

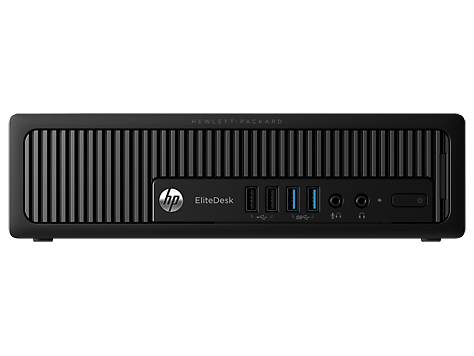
I got a HP EliteDesk 800 G1 USDT Ultra Slim Desktop computer for my ham schack. This is a small computer running on an external power supply just lika a laptop. It turned out to be the major source of RFI in my ham schack.

HP EliteDesk 800 G1 USDT

I suspected the power supply was the culrpit as those are switched ones and thought it might be possible to run the computer directly on my 13.8 VDC power supply that I use for my radios. The only voltages used in a computer is 12 and 5 volts, so there is probably a voltage regulator on the power input that regulates the voltage down from the 19 volts DC that the power supply outputs. Will it also run on 13.8 VDC?

Read more: Running HP EliteDesk 800 G1 USDT on 13.8 volts DC

The power cable to the HP EliteDesk 800 G1 USDT has a 3 pole connector, just the same as on laptops. One is negative, one is positive and the pin in the middle is a “power good” signal from the power supply. I read about people running 3rd party power supplies by connecting the power good over a resistor to the positive side, see this page.

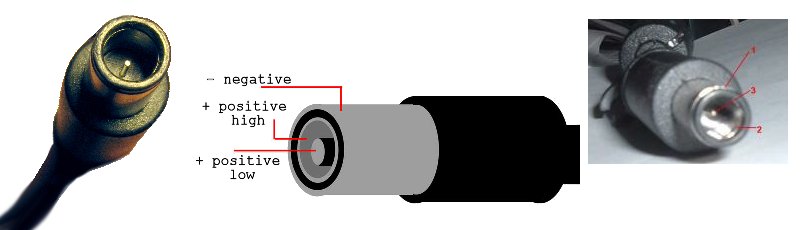
Will it run if I just connect the power good to positive without a resistor? When I measured the voltages from the original power supply positive was +19 VDC and power good read about +12 VDC so it might be sufficient. Discussing it with a tech savvy friend, he suggested it might work and be worth a try.

I didn’t want to cut the cable on the original power supply but luckily I have a friend who hoardes old technical stuff and he happened to have an old broken HP laptop power supply, with the correct cable (who saves broken power supplies?, well it turned out to be useful in this case)

It works!

It turned out it works fine, no resistor needed. This might vary from model to model, but the HP EliteDesk 800 G1 USDT it works by directly connecting power good to the positive. This (image below) is the cable I now use to run my computer directly on 13.8 VDC. Black lead is negative, white is positive and blue is power good.

On 20 meters (14 MHz) my noise floor dropped from S5 to S0-A1!

HP EliteDesk 800 G1 running on 12 volts DC
Power cable to run a HP EliteDesk 800 G1 directly on 13.8 volts DC
IC-706 noise level on 20 m when running computer directly on 12 VDC
IC-706 noise level on 20 m (14 MHz) when running computer directly on 13.8 VDC

Anytone D578UV CPS Tools -> Firmware update doesn’t work

I had problems with the CPS software version 1.16 when trying to update the firmware. The window when selecting Tools -> Firmware just didn’t open. It turns out the software seems really buggy.

Solution: When CPS is running, open a File Explorer and go to “C:\Program Files (x86)\Anytone\D578UV_1.16\” and double click on UpdateQX_Firmware_Update.exe.

The window will now open and you can continue with the firmware update.

Thanks to Ronny/SM7IKJ who gave me to the solution.

Anytone D878UV/D587UV last call TG empty

Anytone D878UV/D578UV last call talkgroup empty

After doing some updates of my Anytone D878UV and D578UV DMR radios I had an annoying problem where the talkgroup field was empty in the last call list as well as in the last call “ticker” scrolling by on top of the screen, just showing an empty “TG:”.

It turned out the problem was caused by the digital contact list that I had generated on radioid.net. I had generated the list with the “TG” checked which generates a contact list including all Brandmeister talk groups. Seems very practical but the problem is that the name field for the talk groups are empty and it seems that Anytone has priority to display the talkgroup info from digital contact list, if it exists, above the info from the talk groups list.

Solution was to generate the digital contact list from radioid.net without checking the TG.

Radioid.net digital contact list generator without the TG checked
HyEndFed 8 band EFHW antenna

My experience with HyEndFed 8 band antenna – bend it like Beckham…

In an earlier post I described my experiences with the HyEndFed 5 band antenna but for several reasons I decided to quickly replace it with the 8 band version for 10/12/15/17/20/30/40/80 meters.

The reasons for this was, for one thing, that I soon discovered that I was missing the WARC bands for different reasons. One of them is contests. Contests are fun – when you are participating. When not, it makes the bands very hard to use. You will have a hard time finding non contest stations and sometimes I just switched the radio off, waiting for the contest to be over. The WARC bands are contest free and became my go to bands during contests.

Another reason for replacing the 5 band antenna was that it is rated for 200 watts SSB PEP. Nothing more than that is mentioned on their website when it comes to power. It was when unpacking the antenna, reading the instructions, I realized this means 30 watts limit for CW and DIGI-modes. It would have been very nice to mention this on the website as well. I am doing about 98% of my QSO:s in CW and I like to be able to use my rig’s full 100 watts of power.

The third reason I initially choose the 5 band antenna was it’s length – 23 meters. This is just about the size I can fit in on my property. But at the time considering a new antenna, I realized that endfed half waves (EFHW) actually doesn’t have to be installed in a straight line. Bend it like Beckham 🙂 It can be installed in an angle for example. The radiation pattern will of course suffer but they still work. The 8 band antenna is 40 meters long, so to fit it in, I must install it in an angle.

So I decided to replace it with the 1 kW model of HyEndFed 8 band antenna. I used the same fur tree as a fixing point, but insted of having the end at the tree, I now has a bend. I selected the 1 kW model to be able to cope with my 100 watts CW. The model chosen was the one with aluminium plate and strand relief on the plate.

8 band efhw 40 meters long
My 8 band efhw 40 meters long, installed in an angle

I can use the antenna on most bands without a tuner but I do actually use my ICOM AT-180 on most bands to get the SWR down to as close as 1:1. With the AT-180 it actually also tunes on 160 meters but my QRM levels on that band are so high so I haven’t tried it in a QSO yet.

It have worked all other bands with the antenna I am quite happy with it, and considering it is a multiband antenna I think it is a very good compromise.

Nagoya RB-400 fell to pieces

Nagoya RB-400 – it just fell to pieces

I purchased a new, unused Nagoya RB-400 lidmount antenna mount from a seller on eBay. After a couple of days of use, I was going to adjust the angle using the hexagon socket screw. When unscrewing it, a part of the mount just fell off (see photo).

I did not overload the mount (largest antenna used while driving was a 65 cm whip). Did I overtight the hexagon scew? Obviously 🙂
I’m quite used to dealing with mechanical stuff and I applied a resonable force while tighting it, to keep the antenna upright while driving but not really enormous force.

Nagoya RB-400 fell to pieces
My brand new Nagoya RB-400 fell to pieces. This ring is not supposed to come off. It is a part of the mechanics keeping the antenna straight up.

I guess it was a manufacturing fault but getting it replaced from the eBay seller would cost me a great part of the price as a new one as the seller policy for returns was that the buyer pays the return cost. Worst case is that it was a construction issue and in that case I will probably soon end up with the same result. I didn’t want this to be bothering me anymore.

Instead I went to a local ham shop and bought another (more expensive) brand and the RB-400 went into the trash.

Anyone else who have experiences like this with the RB-400? My experience with Nagoya products so far is not impressing (see my article on RB-66 rusting scews), so I will probably avoid them in the future.

Nagoya RB-66 rusting screws

I purchased a Nagoya RB-66 lidmount antenna mount from a seller on eBay. The product was new (not second hand used). After two weeks use, I noticed the screws had started rusting.

Nagoya RB-66 rusting scews
Nagoya RB-66 rusting screws

Dear Nagoya. The antenna mount is supposed to be used on cars. Cars are outside all year around, in all kinds of weather conditions. Why don’t you use stainless steel screws? Yes, I know they are more expensive.

I replaced the two screws and the four small hexagon socket screws (they also started to rust) with stainless steel ones so hopefully my problem is solved. But quite annoying. I think a product supposed to be used on a car should be able to handle all year weather conditions and it is quite annoying having to replace parts before being able to use the product properly.

Yaesu FT-818ND QRP and CW keyer

How to operate QRP successfully

Operating ham radio QRP, that is using low power, is probably not a good choise for the new beginner. To successfully operate ham radio QRP you need to use all your skills when it comes to selecting the correct bands, modes, propagation and evauluating current conditions. As a beginner to amateur radio it might be a better idea to start off with for example a 100 watt rig to get a lot of successful QSO:s and acquire knowledge about propagation and conditions first.

However, when you start to know how propagation and band conditions work, operating QRP from a portable location with a small temporary antenna can be an exciting and rewarding challenge. When operating QRP any contact is a success, not just far away DX stations. A contact just 500 or 1000 km:s away using a few watts is really exciting. But operating QRP requires patience. Don’t expect to come home with a log book with hundreds and hundreds of QSO:s.

  • Use CW. It comes through better with small amounts of power than SSB.
  • Listen around on the bands to estimate which bands are open and select the one with most or strongest stations. I usually start off on 10 meters and walk downwards on 12, 15, 17, 20, 30, 40 and 80 meters. If 10 meters is open, it can give you nice contacts with small amounts of power. That is during day time, if it is evening or night you might start off at 30 meters and walk your way down to 40 or 80. But as you know how propagation works, this is not news for you 😉
  • If you have Internet connection, send out a few CQ:s on each band and search for your call on Reverse Beacon Network (enter your callsign in the DX box) to see on what bands you show up and where your signals are strongest.
  • I prefer the WARC bands (12, 17 and 30 meters). They are contest free and generally less crowded.
  • Responding to CQ:s are way more efficient than sending CQ:s yourself. Even though your CQ might be heard, people have a tendency to respond to stronger signals and your will be weak when operating QRP.
  • If you decide to CQ yourself, use the QRP calling frequencies; 28.060, 24.906, 21.060, 18.086, 14.060, 10.116, 7.030 and 3.560 MHz. I usually add “QRP” one time before “PSE K” to indicate that I am operating QRP.

My QRP “go to” band usually is 30 meters. It is often open, it has propagation characteristics between 20 and 40 meters. And I usually get best results on RBN when I work 30 meters.

In the pictures below, I am operating QRP as SM0RGM/6 from a location nr Strömstad, Sweden.

Good luck and hope to see you on the bands! 73 de SM0RGM / OZ0RGM

Reverse Beacon Network spots using my EFHW and QRP 6 watts

Why I love end fed half wave (EFHW) antennas

The antenna seems always to be a compromise between practical matters and performance. While not being the most high performance antenna, I find the end fed half wave (EFHW) a very practical antenna, especially during portable operations.

The EFHW doesn’t need to be straight. It can be bent in angles and be “abused” a lot.

In this video I have a temporary installation in a vacation home (time share) where I am not able to erect any masts, not being able to use trees or other houses as fixation points for my antenna. I used some zip ties only that can be removed without leaving any marks.

The antenna height is far from optimal and the antenna is bent several times. It is also close to the rain gutters made of metal. Still I have fine SWR levels on all bands (10/15/20/40 m) and can work all of Europe on my QRP rig (6 watts) (see the screenshot from Reverse Beacon Network).

Cisco RV160 RFI fix

Cisco RV160 RFI-problems [fixed]

Being an amateur radio operator (or HAM-radio operator) I need to use electronic devices with as low radio emissions as possible in order to keep a low noise level on the shortwave bands (or HF-bands). I found out that my Cisco RV160 router was one of the major sources of radio noise (RFI or Radio Frequency Interference) in my home. It turned out it was easily fixed as the culprit was not the router in itself, but it’s power supply.

The router runs on 12 volts DC (original power supply rated up to 1,5A) which is often available in the ham schack already. So in that case, get rid of the original power supply and hook up the router to your 12 volts DC supply in the shack. In my case, the router was located in another part of the house so I just replaced the power supply with another, transformer based power supply. In my case, a Mascot 6823, rated for 12 volts DC, 1A (intermittently up to 1,3A). Even though not the same amp rating as the original, it seems to be sufficient.