Import visit card file contacts (VCF) to Windows 7, 8 and 10 Contacts

In Windows 7. 8 or 10 Contacts there is only a possibility to import contacts in CSV format. If you have your contacts in  VCF files you need to use Windows Live mail program in order to import them.

First of all, if you have your contacts in many different VCF files it can be convenient to combine them into one single file. That way you can import one file instead of thousands. This post describes how to combine them.

  1. Download Windows Live mail here.
  2. Install Windows Live mail on your computer.
  3. Open Windows Live mail and configure your mail account.
  4. Click on Contacts and when asked, log in to your Windows Live account (i.e. the same Microsoft account used to log in to your computer running Windows 7, 8 or 10)
  5. Click Import, select Visit card (.vcf)
  6. Select your VCF file and import it.


How to read a Mac disk or memory stick in a Windows computer

USB memory sticks or external disks that has been formatted on a Mac might not be readable if you connect it to a Windows computer. The reason is that the Mac has formatted it using a file system unknown by Windows.

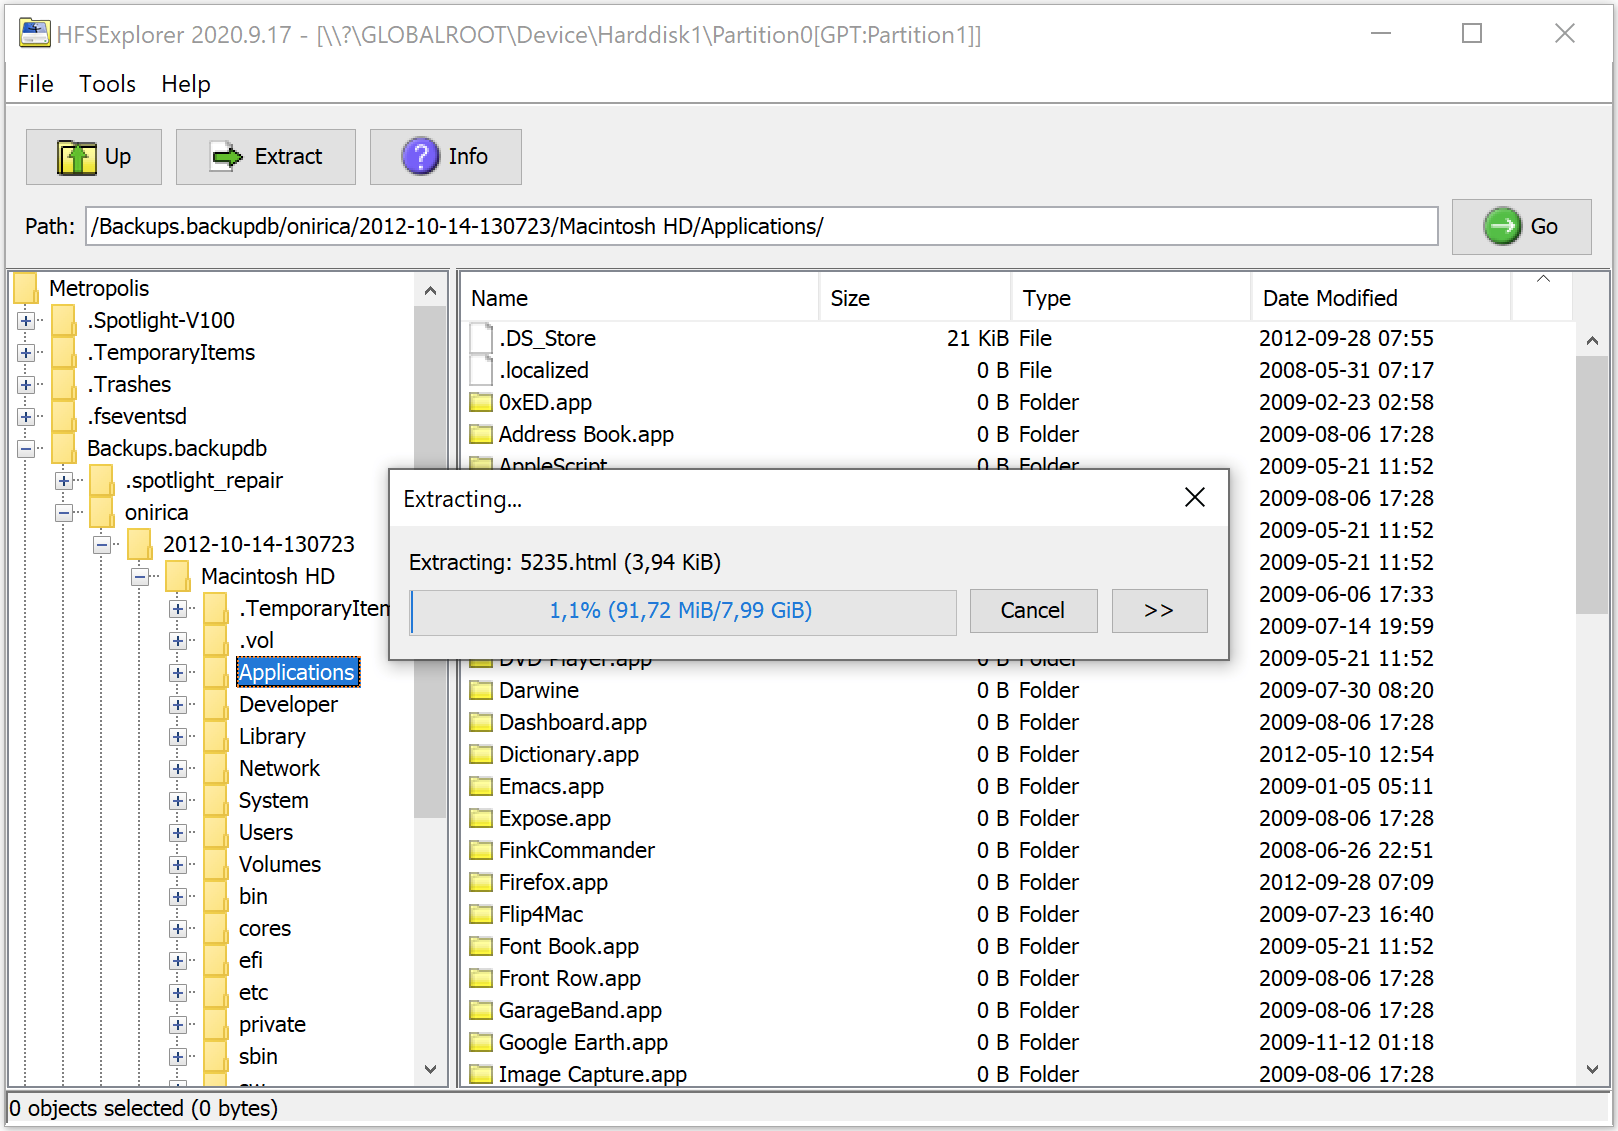
To read the disk you can use the free tool hfsexplorer.

hfsexlorer

hfsexlorer

How to combine multiple .vcf files into one

If you have your contacts exported into .vcf files, they can easily be imported into for example iCloud, Google or your email program. However, if you have a couple of hundreds or thousands of contacts, and equally amount of .vcf files it will be very inefficient to import each contact one by one.

A solution is to combine all contacts into one single .vcf file. By importing the combined .vcf file all your contacts are imported at once.

To combine all .vcf files into a single one can easily be done using a Windows command prompt (cmd).

cd directory-path-where-your-vcf-files-are-located
copy *.vcf allcontacts.vcf

Now import the file allcontacts.vcf into iCloud or similar.

Connecting a Windows client to a WebDAV drive

There are several third party products available to connect a Windows client to a WebDAV drive. This guide will explain how to do it with using native Windows and has been tested using Windows 7 but should work for other versions too. For Windows server 2003, Windows XP and Vista users, you first need to download a web folders patch from Microsoft.

It is a recommendation that you connect to the WebDAV drive using encryption (SSL), i.e. https. If you have a real, non self signed, certificate for your host, you’re good to go (the one that makes they key symbol in your browser show locked, green and give no warnings). Just skip down to the section describing how to setup the connection.


Using a self signed SSL certificate

If you are using a self signed SSL certificate, or signed by a non trusted certificate authority (CA), you will get the error message “An unexpected network error occurred” when trying to connect the WebDAV drive.

If you are using a self signed certficate, make sure it is issued for the hostname you are accessing the WebDAV drive through. If not, you must create a new certificate issued for the hostname of your WebDAV host. No workaround on that part as far as I know.

When you have a self signed certificate for your WebDAV hostname installed on your WebDAV server you must add the certificate on the client. This is how you do it:

  1. Run Internet Explorer as Administrator (right click on it and select “Run as administrator”)
  2. Go to your WebDAV host by entering the hostname in the address bar, like https://mywebdavhost (make sure you use https:)
  3. Select “Continue to this website (not recommended)”
  4. Click on the “Certificate error” displayed in red in the address bar
  5. Click on “View certificates”
  6. Click on “Install certificate”
  7. Click on “Next” in the Import wizard
  8. In the next step, select “Place all certificates in the following store” and click “Browse”
  9. Select “Trusted Root Certification Authorities” and click OK
  10. Click “Next”
  11. Answer “Yes” to the security question


Setting up Windows to map a network drive using native WebDAV

When your SSL certificate is sorted out (either by using a real certificate or a self signed one using the above steps), you are ready to map the network drives.

  1. Start the file manager, for example by clicking the Start menu and then click on “Computer”
  2. In the top of the file manager window, click on “Map network drive”
  3. Select folder letter, for example Z:
  4. The folder, enter the URL of your WebDAV host, like https://mywebdavhost
  5. Select “Connect using different credentials” and optionally “Reconnect at logon”
  6. Click “Next”
  7. Enter the WebDAV host user name and password and if you previously selected “Reconnect at logon” it can be a good idea to select “Remember my password”
  8. Click “OK”

How to find out the IP-address of a remote desktop client on Windows server

From a command shell (cmd) issue the command:

netstat -a | find “:3389” | find “ESTABLISHED”

This will a result in a list of all remote IP-addresses connected using RDP to the server.

If the server is using a non-standard port for RDP, replace 3389 with the non-standard port.

Microsoft remote desktop (RDP) shows black screen after login [SOLUTION]

After connecting by remote desktop to a machine, the initial welcome screen is displayed then the screen goes black.

Press CTRL-ALT-END and wait (it might take a while). When the Cancel button is visible, hit Cancel. Now the screen goes back to normal.

How to convert a SVG (scalable vector graphics) image to PNG

This method aims at Windows users but similar methods are probably also useable in other environments.

  1. Right click on the SVG image file and select Open with
  2. Select Internet Explorer
  3. In Internet Explorer right click on the image and select Save image as
  4. In the File Format box switch from Scalable Vector Graphics (*.svg) to PNG (*.png) 
  5. Click Save

For Ubuntu there is a simple solution described here -> http://www.upubuntu.com/2012/06/how-to-convert-svg-files-to-other-image.html

FileZilla FTP-client retrieve directory listing failed on MLSD command using TLS

Some week ago FileZilla released a new version – 3.10.0.1. After installing this version some clients had problems connecting with their web hosting servers using FTP. One of the changes in FileZilla was that it now defaults to TLS encrypted connections if the server supports it, which many web hosting providers do.

However, if the FTP server is not properly configured together with it’s firewall the client will connect but fail to retrieve the directory listing (timeout).

A workaround on the client side is to connect with plain old FTP using no encryption. To do this in the later versions of FileZilla you must create a connection in the site manager and select plain FTP (unsecure) in the encryption field. (This option is not availible in the quick connect.)

A better solution is to solve the problem on the server side. To do this the FTP server must be configured to use a specific range of ports for passive mode and allowing traffic to them through the server firewall. The example below shows how to do this with pure-ftpd and iptables. In the example we setup pure-ftpd to use ports 50000-55000 for passive transfers and then we allow the same range in iptables.

echo “50000 55000” > /etc/pure-ftpd/conf/PassivePortRange
/etc/init.d/pure-ftpd restart

Then add the following to your iptables rules and reload them:

iptables -I INPUT -p tcp -m tcp –dport 50000:55000 -j ACCEPT

Convert Microsoft Outlook PST email to IMAP without Outlook

A client was going to stop using Microsoft Outlook and Exchange server and move their email to an ordinary web hosting company using IMAP. The client was downscaling and had no use of the benefits of Microsoft Exchange like shared contacts and calendars. They where just using it for email which could be obtained much cheaper by using the IMAP account at their web hosting provider.

So I was faced with the task of converting their old email contained in PST files. They had already shut down their Exchange server and I could not use the Outlook program. I just had the PST files that where exported before the server shutdown and needed them imported into the IMAP account without using Outlook as it was not availible for me.

This is how I solved it.

Tools used:

  1. Download and install Thunderbird. Set it up with the target email account both as an IMAP account and a POP3 account (it was a problem importing the converted eml files directly to the IMAP account so I had to import them to the POP3 account which is stored locally and then drag them over to the IMAP account, more about that later on). Make sure you setup the POP3 account to leave mail on server and not delete mail when deleted locally.
  2. Download the ImportExportTools extension for Thunderbird. Drag the downloaded file onto Thunderbird in the task bar to install it.
  3. Download the free trial of the SysTools PST converter and install it. The free version is limited to 25 emails per folder so if you have more emails you need to purchase it ($49 when writing this article). You can make a test run with the free version so you see everything works before you go on and buy it.
  4. Run the SysTools PST converter.
  5. Click the Add file button and select your PST file.
  6. Click the Export button and select EML format, and check the folders you wish to export (normally the top folder). Enter a target folder. Then click the Export button.
  7. In Thunderbird, right click the POP3 email account and select New folder and call it “From PST” for example.
  8. Select the “From PST” folder and go to the menu icon in Thunderbird and select Tools -> ImportExport-tools -> Import all EML from a folder -> and it’s subfolders. Select the top folder of your email export in step 6 and click Select folder.
  9. All subfolder and it’s email should now turn up in the “From PST” folder. Now drag the “From PST” folder from the POP3 account to the IMAP account in Thunderbird.
  10. Finally delete the POP3 account in Thunderbird.

Windows Live Mail (WLM) problem setting IMAP Sent mail folder

When configuring Microsoft Windows Live Mail (WLM) with an IMAP email account, you should set which folders on the IMAP server that should be used for Sent, Drafts, Deleted and Junk email. This is done by going into the setup for your email account in Windows Live Mail, edit properties for the account and select the IMAP tab. Your email server provider should be able to inform you about the correct IMAP folder names. Normally the root prefix folder should be Inbox

However, in some cases (versions) of WLM there seems to be a bug so when setting the root folder to Inbox your Inbox will not be visible in the left pane. A workaround (solution) is to leave the root folder empty and instead prefix your IMAP folder names with "Inbox." like Inbox.Sent for the sent folder. Like this (sorry for the swedish version screenshot, didn’t have an english WLM at hand): 

Windows Live Mail IMAP folders

Windows Live Mail folders for Sent, Drafts, Deleted and Junk mail